2018-06 Release Notes
Iteration: 2018-06
October 25th, 2018
What’s New?
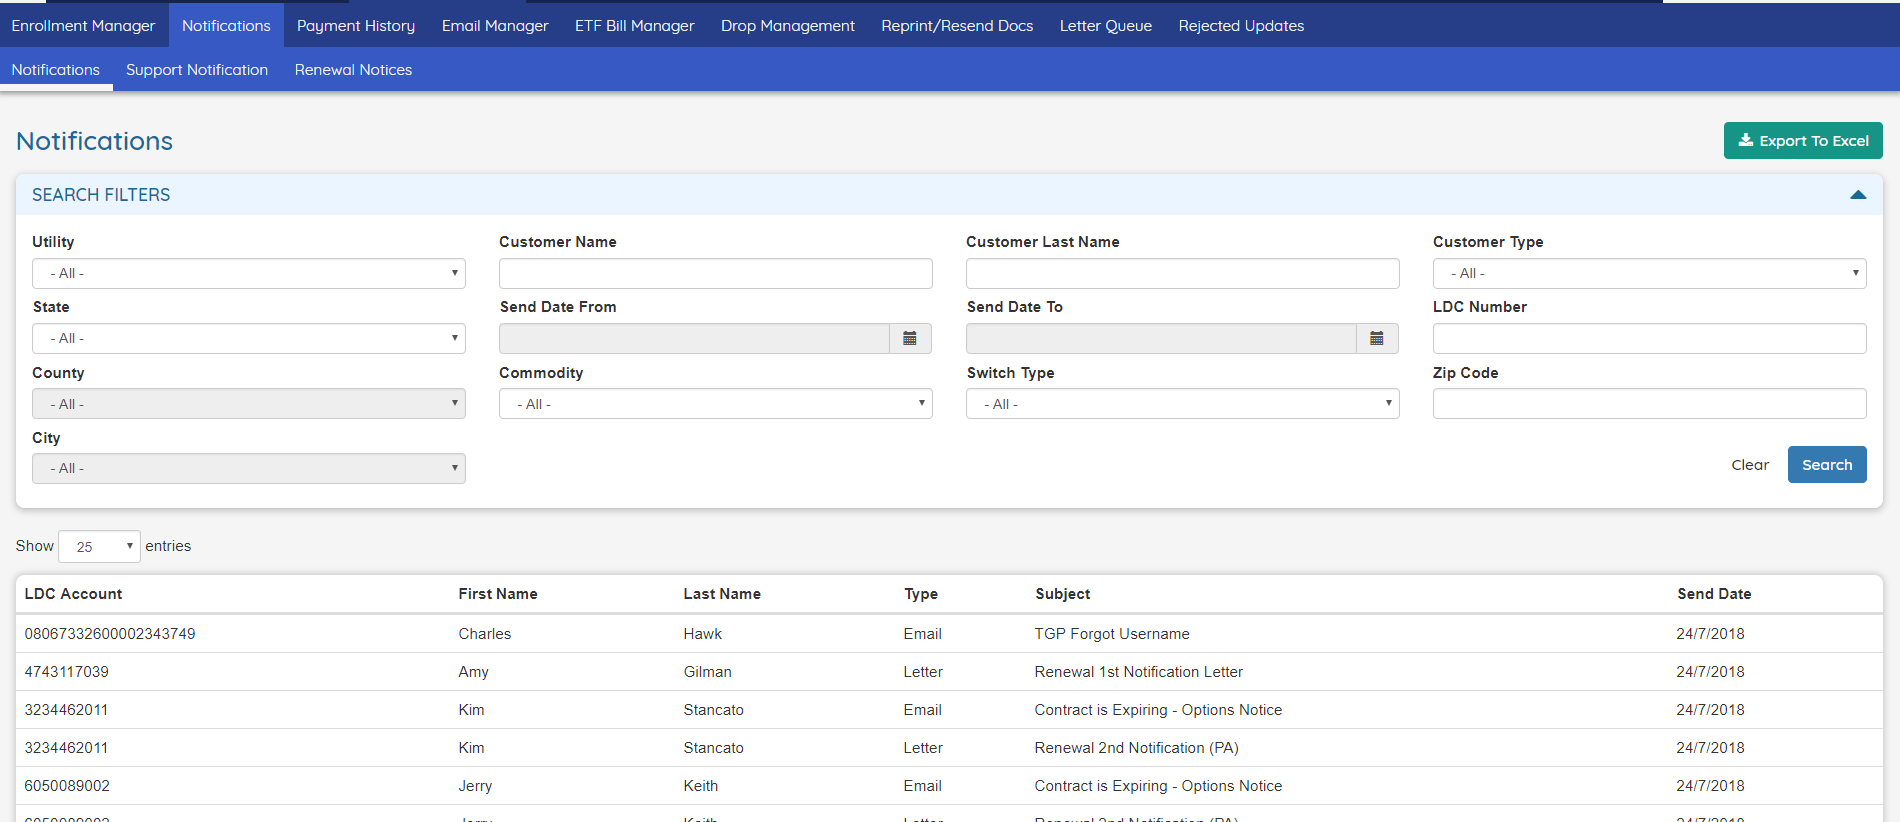
| \(^▽^)/ | Updated Notifications to the 2.0 UI. |
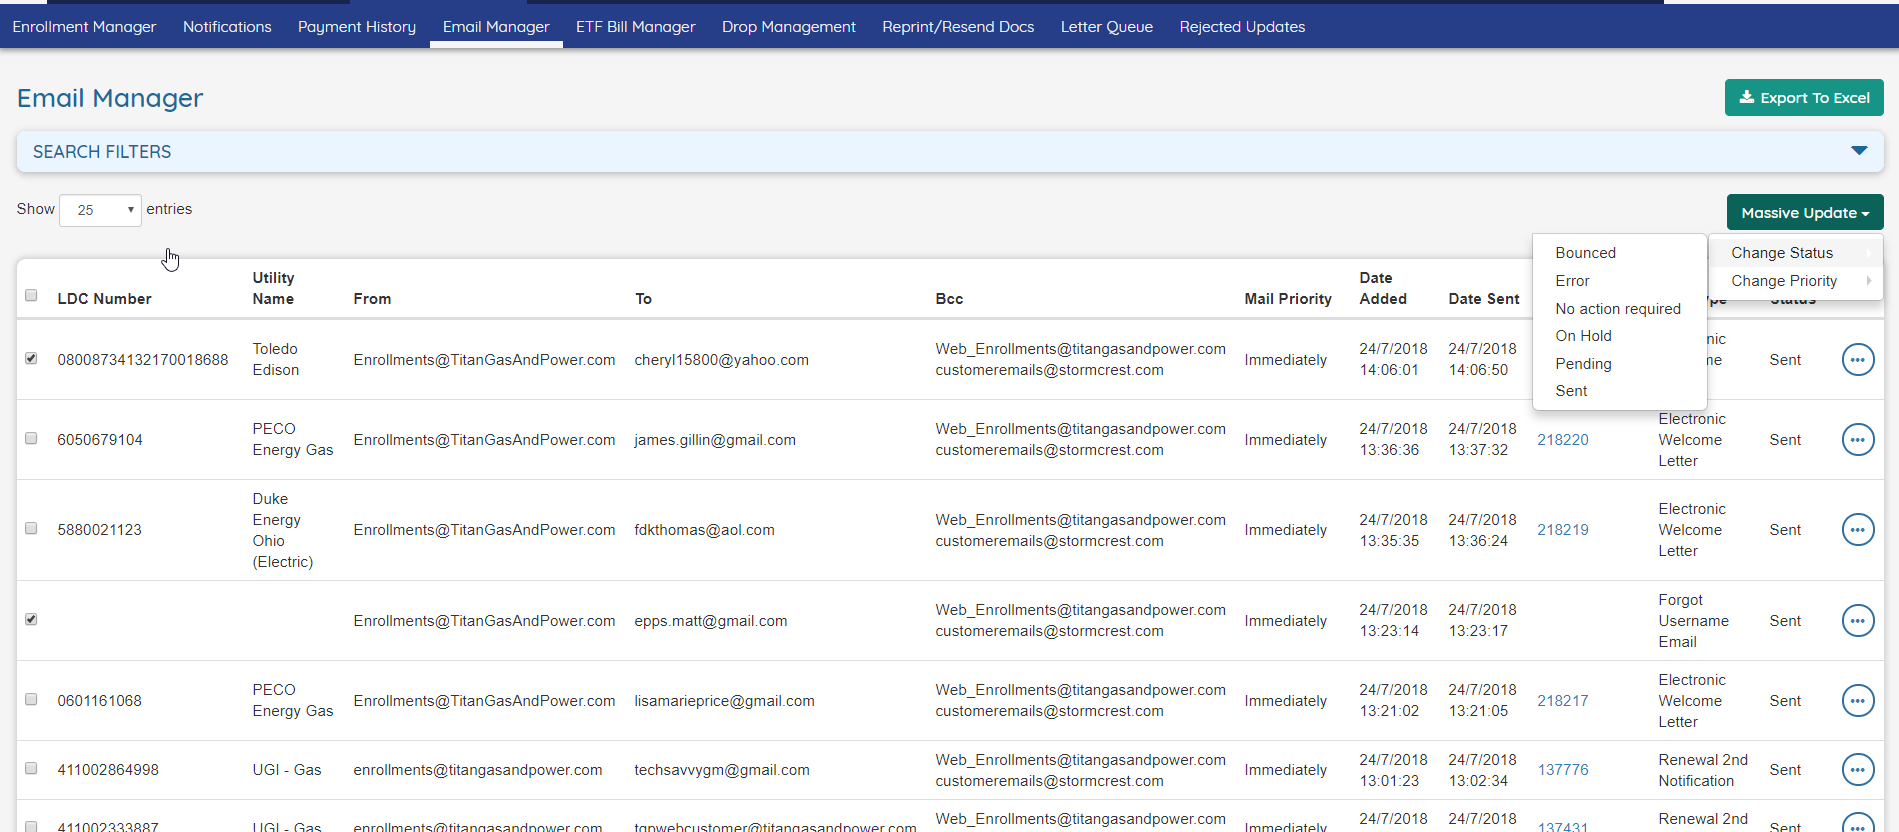
| \(^▽^)/ | Updated Email Manager to the 2.0 UI. |
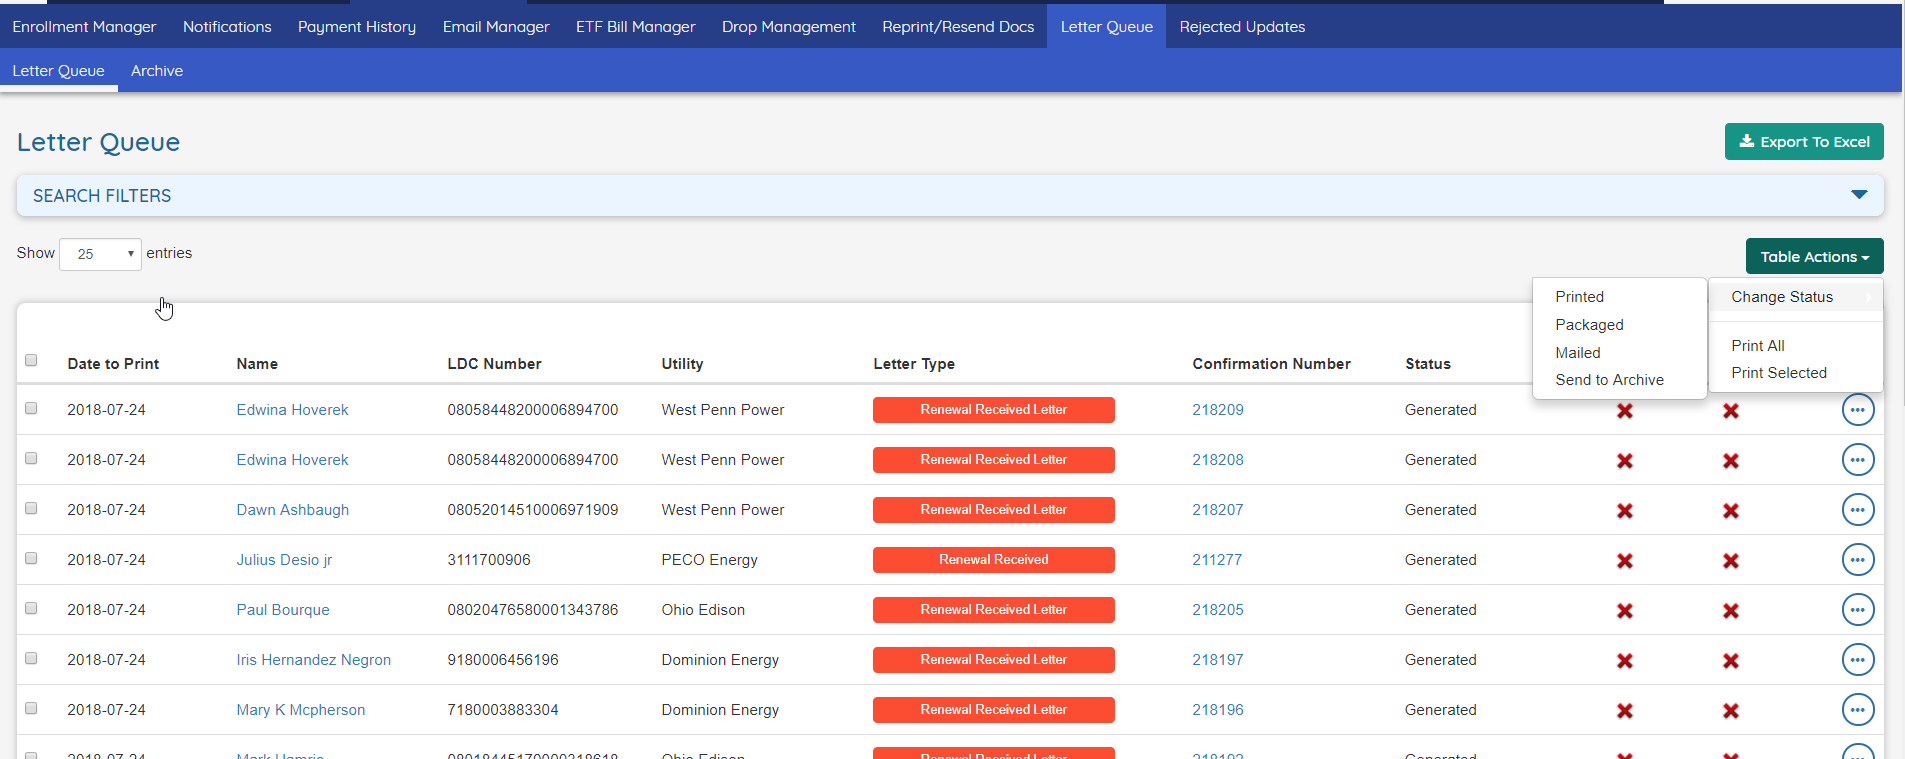
| \(^▽^)/ | Updated Letter Queue to the 2.0 UI. |
| \(^▽^)/ | We have sticky headers in all 2.0 tables! |
| 2521 | Quick Enrollment now shows Cancellation Fee in the available products table. |
| 2384 | Now the Retention Queue shows information regarding previous drops. |
| 2517 | Now the user can filter by Last Update date range in Drop History. |
| 2528 2499 | Now the system imports Usage Detail, Billing Charge and Payments data from ESG. |
| 2501 | Now there is a role permission for the Edit Plan button in Enrollment Details: Change_Plan_From_Enrollment_Details. |
| 2534 | Added the ability to choose an Autoresponder when re-sending a Letter as an Email from Reprint/Resend Documents. |
| 445 | Added integration with Sendgrid API to catch bounce emails. |
| 2078 | Send emails to affiliates when Enrollments Status change. |
Fixes and Improvements
| 2485 | Improved Excel Export for Sales Importer. |
| 2492 | Fixed an issue with the Queue Filter in Drop Management not working. |
| 2494 | Fixed an issue where the system couldn’t find the Utility in Sales Import. |
| 2504 | Fixed an issue where certain Log Triggers weren’t logging enough information. |
| 2555 | Fixed an issue that prevented the user from creating a new plan. |
| 2522 | Fixed an issue with ampersand characters in prospects submitted to ESG. |
| 2549 | Fixed an issue where Sales Importer dropdowns were empty. |
| 2553 | Fixed an issue that made new Enrollments being imported as Re-Enrolls. |
| 2556 | Fixed an issue that prevented to load the available plans in the Rates Wizard. |
Features & Fixes Details
Updated Notifications to the 2.0 UI
Updated Email Manager to the 2.0 UI
Updated Letter Queue to the 2.0 UI
We have sticky headers in all 2.0 tables!
We made a small but useful improvement to all the tables within the 2.0 UI! Now, when you scroll the screen past the point where the header of a table should get hidden, this will get at the top of the screen and return to its natural position when the user scrolls back to the top. Look at the following images to get an idea of what this means.


Now Quick Enrollment shows the Cancellation Fee in the available products table
Now the user no longer needs to open the details of a plan to be able to see the cancellation fee of each one.

Now the Retention Queue shows information regarding previous drops
There’s a new column in the Retention Queue that show the amount of previous Drops associated to the listed drops.

If a Drop has previous drops associated, the the details can be seen by selecting the _View Prious Drops _option in the More menu.

This will show a popup with the details:

Improved Excel Export for Sales Importer
The export feature of the Sales Importer screen has received two improvements. The first one is that now this feature takes in consideration the filters applied in the screen instead of exporting all the records. The second one is that a lot of columns with garbage data has been removed from the generated file, to provide much cleaner and useful data.
Added integration with Sendgrid API to catch bounce emails
Every now and then, a customer won’t receive an email due to different reasons: incorrect email address, servers down, some policy to reject emails, etc. These scenarios are not easy to catch unless using dedicated tools. This is where integration with Sendgrid API comes to play.
To use this feature you need a Sendgrid Account. Any account plan will work, even the trial one. Once you have it you need to set it up both in the OpsAdmin system and in Sendgrid.
SendGrid Setup
First, let’s setup everything in sendgrid.
You need to generate an API Key so OpsAdmin can authenticate to your SendGrid account. To do this you have to go to your SendGrid account and there open Settings → API Keys → Create API Key
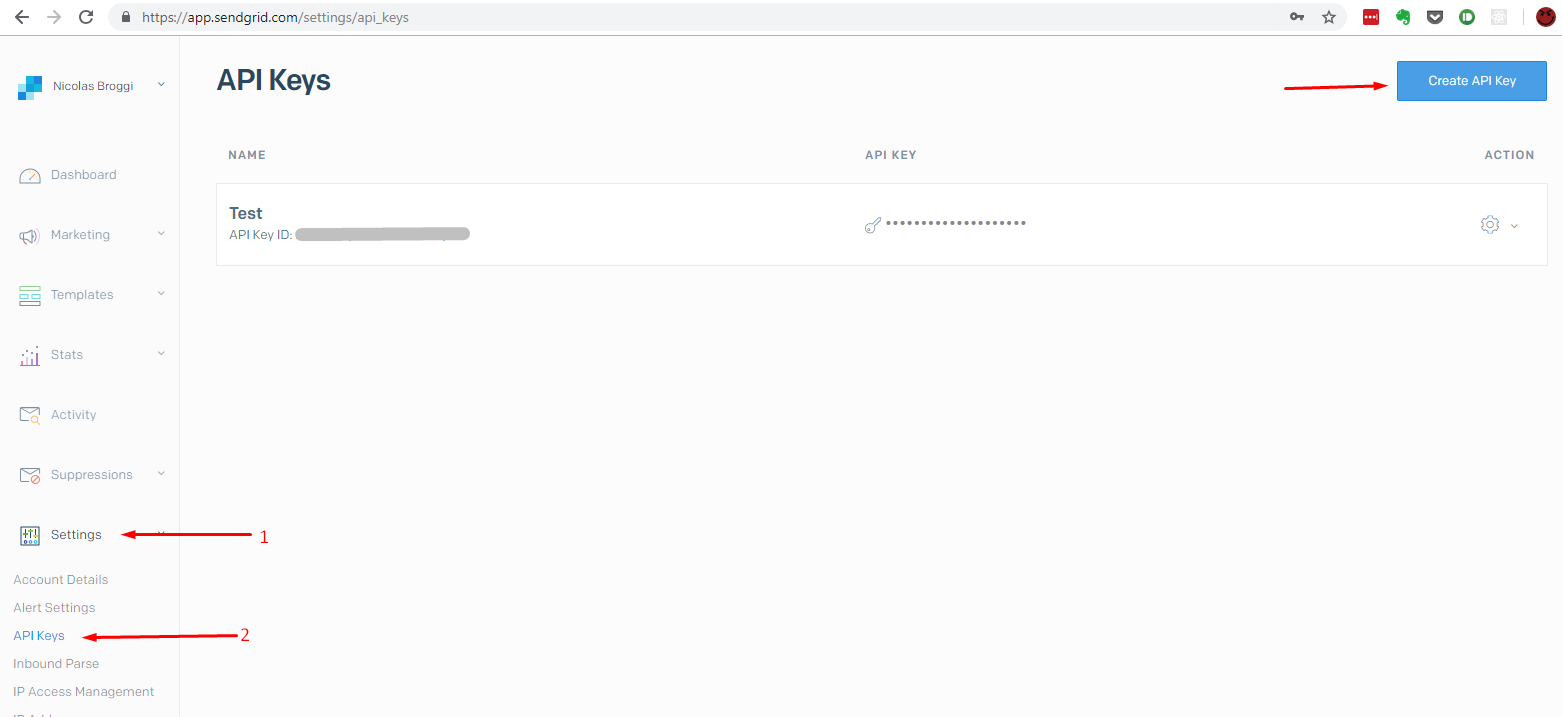
A popup will show where you only need to enter any name you want and select Create & View. This next step is very important. SendGrid will tell you that the API Key was created and show it on screen. Make sure to copy it somewhere else because if you lose it you can’t recover it; you need to create a new key.
This is the key that you will enter in OpsAdmin, but we will get there in a minute.
The next thing to do in SendGrid is enable the the notifications for drops and bounces. To do this you need to go to Setings → Mail Settings → Event Notification.
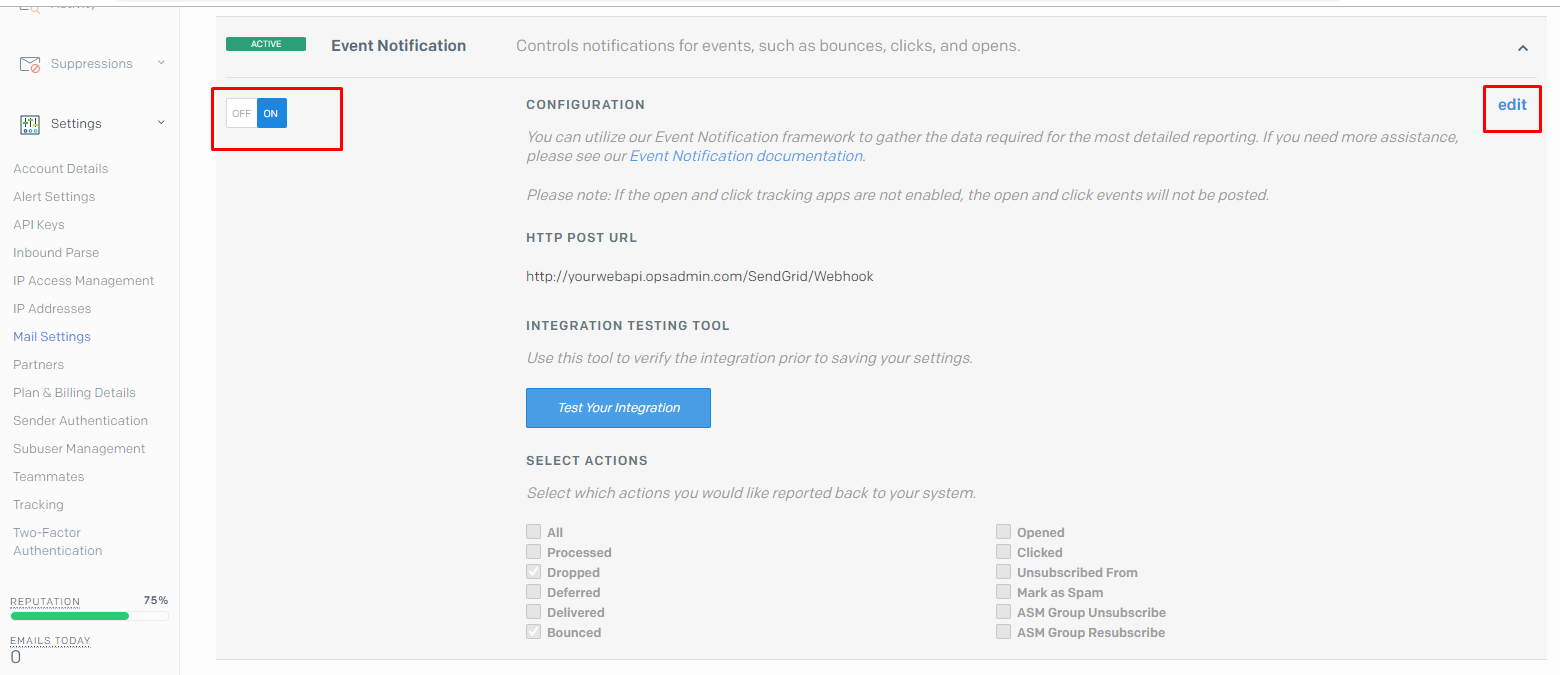
There you have to activate the Event Notification, and after clicking the edit button you must enter the webapi URL where sendgrid should send the notifications and the actions that sendgrid will report.
The URL refers to a WebAPI OpsAdmin has. It will be like
http://webapi.opsadmin.com/SendGrid/WebhookUnder actions you must select Dropped and Bounced. You can select other options, but OpsAdmin will simply ignore them.
OpsAdmin Setup
OpsAdmin Setup is much simpler. You simply need to go System Setup and search for the EMail_Provider and SendGrid_API_KEY options. Usually OpsAdmin uses a generic library to send emails, but to use this new feature you need to change the Email_Provider key to use Sendgrid. Later you need to copy you SendGrid API KEY in the second option (the one you generated in SendGrid).
Usage and Behavior
Once everything is setup the system will start catching bounced and dropped emails. When any of these situations happen, SendGrid informs to OpsAdmin about it. For each email that’s bounced or dropped the system will do the following:

- Change the email status in the Email Queue as Bounced.
- Change the customer email to the Default Email for Customers, but save the original to change it back if needed (this backup is on the database and not accessible through OpsAdmin).
- Generate a letter for the email that was dropped or bounced.
- Generate a letter for the customer informing that the email address was bounced. This last thing, will work only if the user created the required Autoresponder and Autoresponder Package that was added with this release (New Bounced Email).
Send emails to affiliates when Enrollments Status change
Now the system has the ability to send emails to the affiliates when an Enrollment that has a plan of an affiliate changes it’s status.
To do this the system uses the Autoresponder feature. You need to setup the Autoresponder Package and Autoresponder.
The Autoresponder Package should have any of the Triggers that the user want to send the Autoresponder for. For example, when the status is changed to cancelled.
The Autoresponder must be of the Area Affiliates and the package with the required triggers. These autoresponders can be customized by Affiliate if required.